
- Видео 188
- Просмотров 34 876 354
Next Level Carpentry
США
Добавлен 8 янв 2015
Next Level Carpentry is for aspiring carpenters who want to take their skills to the Next Level.
The tips, tricks and methods of work featured here are things I've picked up and developed during nearly 50 years in the building trades and are what make my 'The Timber Tailor' residential/light commercial remodeling business profitable and successful.
Since I'm a master carpenter and video production amateur my hope is that viewers will find enough value in the content to learn worthwhile skills despite my less-than-great video production capabilities.
I added Patreon for viewers who want to support production of free NLC videos: www.patreon.com/NextLevelCarpentry
Correspondence or items of interest can be sent to:
Next Level Carpentry
3213 W. Main St
PMB #111
Rapid City, SD 57702
Thank you for watching and subscribing!
Perfect Mortises for Round Corner Hinges
Learn how to make a simple, easy-to-use template to match tricky mortises for round cornered hinges of any size. Let a Master Carpenter guide you through the process to achieve professional results every time!
FWIW RUclips's "Super Thanks" feature a great way to 'tip' content creators and is active on the Next Level Carpentry Channel... juss sayin' 😉
Tools and supplies you see in use during this video are available through the Next Level Carpentry Influencer's Page on Amazon: amzn.to/3xHBVrA
Note to Viewers: Purchases made through these links are at the same low online price you expect but Amazon pays small ad fees to the Channel that help justify the time I invest producing videos you watch...
Просмотров: 9 521
Видео


Build Floating Closet Organizer Shelves
Просмотров 13 тыс.3 месяца назад
A deep-dive Master Class showing pro tips, techniques, tools and hacks for building professional grade, custom/scalable floating shelf units for closet organizing in a modest woodworking shop. FWIW RUclips's "Super Thanks" feature a great way to 'tip' content creators and is active on the Next Level Carpentry Channel... juss sayin' 😉 Tools and supplies you see in use during this video are avail...

Camera Boom Arm & Gantry Build
Просмотров 10 тыс.3 месяца назад
Tripods are SO last year! Upgrade to an overhead Camera Boom Arm & Gantry for improved video production from ideal camera angles not possible using a tripod. FWIW RUclips's "Super Thanks" feature a great way to 'tip' content creators and is active on the Next Level Carpentry Channel... juss sayin' 😉 Tools and supplies you see in use during this video are available through the Next Level Carpent...
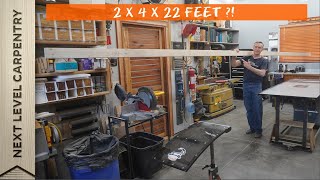
TwUberfours DON'T come from Uber-Tall trees!
Просмотров 82 тыс.5 месяцев назад
Learn how to make a "TwUberfour" 22 FEET long or longer using a special "splined scarf joint"! FWIW RUclips's "Super Thanks" feature a great way to 'tip' content creators and is active on the Next Level Carpentry Channel... juss sayin' 😉 Tools and supplies you see in use during this video are available through the Next Level Carpentry Influencer's Page on Amazon: amzn.to/42f430i Note to Viewers...

Master Carpenter's Tool Tote Build
Просмотров 300 тыс.6 месяцев назад
FREE PREMIUM CONTENT: Master Carpenter's Tool Tote Master Class build with no paywall! This 3-1/2 HOUR deep dive tutorial shows the entire build including joinery, jigs, fabrication and glue up with detours into digital router lift operation, laser engraving and application of a flawless finish. Buckle up, hang on and enjoy! PDF Master Plans for this custom design Master Carpenter's Tool Tote a...

Lasered Louvers
Просмотров 11 тыс.8 месяцев назад
Making mortises for louver slats with a laser opens up design/style options not possible with router jigs or CNC machines for a modern touch to timeless louvered panels. Ready to enter the brave new world of Laser Fabrication and Engraving? GREAT!! Use this discount code for a great deal on any xTool product orders made through the Next Level Carpentry Channel: xTool P2: bit.ly/3tX7Gec Discount...

Wall-Mounted Clothes Drying Rack
Просмотров 19 тыс.9 месяцев назад
A Deep-Dive video showing how to build this custom Wall-Mounted Clothes Drying Rack with 14 FEET of hanging space! PDF Plans available. Premium content with no paywall for start-to-finish instruction by Master Carpenter Matt Jackson! FWIW RUclips's "Super Thanks" feature a great way to 'tip' content creators and is active on the Next Level Carpentry Channel... juss sayin' 😉 PDF Plan Set for thi...

Make Shelves Fit Perfectly with Simple Stopped Dado Jig!
Просмотров 225 тыс.10 месяцев назад
Master Carpenter Matt Jackson shows how to make a simple router jig for routing precise stopped dados for shelves with a perfect fit that are also surprisingly strong. Learn how easy it is to make the router jig for stopped dados regardless of the project you're working on! FWIW RUclips's "Super Thanks" feature a great way to 'tip' content creators and is active on the Next Level Carpentry Chan...

Organize with Custom Toolchest Pullouts
Просмотров 16 тыс.10 месяцев назад
Premium Content, NO Paywall: These Sweet Custom Pullouts with full extension soft-close drawer glides turn good metal cabinets into great ones by making everything accessible. Hang with Master Carpenter Matt Jackson and see how to upgrade storage cabinets with this COMPLETE build video! FWIW RUclips's "Super Thanks" feature a great way to 'tip' content creators and is active on the Next Level C...
Game changing xTool P2 55 Watt CO2 Laser gets a test drive by Old School Master Carpenter
Просмотров 30 тыс.11 месяцев назад
Check out $500 off coupon code below! An Old School Master Carpenter test drives the game-changing xTool P2 55 Watt CO2 Laser Machine after unboxing it, building a custom mobile cart and doing initial setup. If a "digital troglodyte" like Master Carpenter Matt Jackson can do it, you can too! A PDF Plan Set for the P2 Laser Cart featured in this video will be available soon! If interested, pleas...
Tapeless Drywall Repair
Просмотров 30 тыс.Год назад
Learn how this method for Tapeless Drywall Repair produces better results AND saves time/steps in the process. Known by some as a 'California Patch', useful for smaller repairs, Master Carpenter Matt Jackson shows how to take the technique to the Next Level with a full 18" x 24" Super Patch! FWIW RUclips's "Super Thanks" feature a great way to 'tip' content creators and is active on the Next Le...
Bluebird Nestbox Build
Просмотров 48 тыс.Год назад
Watch Master Carpenter Matt Jackson Build a Nestbox for beautiful Western bluebirds. Detailed PDF plans are available here: next-level-carpentry-swag-shop.creator-spring.com/listing/new-bluebird-nestbox-by-next-l FWIW RUclips's "Super Thanks" feature a great way to 'tip' content creators and is active on the Next Level Carpentry Channel... juss sayin' 😉 Tools and supplies you see in use during ...
Replacing Stolen Tools
Просмотров 47 тыс.Год назад
Tool thief forces decision on replacing stolen tools: Do I replace missing tools with the same brand or decide it's time to switch? Are you considering purchasing any new tools after watching this video? If so, will you consider shopping with Next Level Carpentry at ACME Tools? Any tools purchased through affiliate links here are the same to you but ACME pays small add fees that support video p...
Ultimate Zero Clearance Throat Plate with Replaceable Inserts
Просмотров 242 тыс.Год назад
The design of this Zero Clearance Throat Plate with Replaceable Inserts for tablesaws lets you get precision results consistently. This FULL build video shows how you can make one of your own that will be the last one you'll ever need so check out the Chapter List below as a guide. FWIW RUclips's "Super Thanks" feature a great way to 'tip' content creators and is active on the Next Level Carpen...
6 Panel to Flat Panel Door Rescue
Просмотров 43 тыс.Год назад
Clever carpentry rescues a house full of 6 panel doors from landing in a landfill. A straightforward re-paneling process saves these solid wood door slabs AND their jambs from an unpleasant fate. Learn millwork magic from Master Carpenter Matt Jackson as he performs a panelectomy and reconstruction that means a new lease on life for old doors. FWIW RUclips's "Super Thanks" feature a great way t...
Milwaukee Rotary Hammer Review & Ergonomic Improvement
Просмотров 16 тыс.Год назад
Milwaukee Rotary Hammer Review & Ergonomic Improvement
Pro Tips, Techniques and Tools to Create Weathered Wood
Просмотров 35 тыс.Год назад
Pro Tips, Techniques and Tools to Create Weathered Wood
Building GROATs: The Greatest Roller Of All Time Episode #1
Просмотров 47 тыс.Год назад
Building GROATs: The Greatest Roller Of All Time Episode #1
Powermatic PM2820EVS Drillpress Unboxing & Assembly
Просмотров 28 тыс.2 года назад
Powermatic PM2820EVS Drillpress Unboxing & Assembly
Donut Day Short for YouTube #SHORTS
Просмотров 4,8 тыс.2 года назад
Donut Day Short for RUclips #SHORTS
$300/300K Subscriber Appreciation Giveaway Drawing
Просмотров 4,4 тыс.2 года назад
$300/300K Subscriber Appreciation Giveaway Drawing
$300/300K Subscriber Appreciation Giveaway
Просмотров 8 тыс.2 года назад
$300/300K Subscriber Appreciation Giveaway
Gyro Air G700 Deep-Dive Filter Change
Просмотров 13 тыс.2 года назад
Gyro Air G700 Deep-Dive Filter Change
Thanks for sharing this Matt. You made my repair project much easier than it would have been.
You betcha! This is not the sort of thing you want to make a career out of but I can tell you the more of them you do the faster and easier it gets😊
Strap your lumber down, got it.
This video takes me back to physics class with ideal spherical cows. It was so easy to fit that jig on an idealized perfectly square door jamb. In reality door jambs are covered in trim. I don't see how that jig would fit past the door trim.
After 3:34:56 of learning I would like to say… Amazing result!
Excellent tool, I used a damaged hard drive magnet
That’s very good Matt, I’ve made templates like that but I make them square, for radius hinges you could just use a Bering guided router bit the right size to make that 5/8 radius.
Thanks! CA glue and 1/2" HDF are great for all sorts of templates, right? : ruclips.net/video/RSW2ZSdyEmw/видео.html The benefit of building the hinge corner radius into the template IMHO is that one size bit works with any radius (down to 1/4", that is) and I've not seen a 1 1/4" radius 1/4" shank flush trim bit. Of course they're using the full size bit for pre-hung door hanging machines but that's a different scenario.
Great informative video. Thank you for making this.
Perfect timing again Matt, I have a house lot of doors to replace, will definitely give this a go.
Cool... I don't like to discourage your ambition but, if you end up with new doors and jambs and there's more than a few, a dedicated hinge routing fixture that adjusts for different height door slabs and hinge count might be a more efficient way to go... and a good excuse to buy one too! Best, Matt
Very nice practical trip! Thanks for sharing.
Tahnk you, soo cool!!!
Clear and concise. Easily understood. Thank you for your excellent advice.
Okay, love the tip, but a little more information if you please. Maybe I missed it but... What type of "standard construction screw" are you using, and what gauge wire? Looks like a standard cinder block, or rather, it looks like the cinder blocks that make up my garage. Trying to put some 2x4 on my garage walls to make a French cleat wall for storage. Also, is there some reason you didn't use Tapcons? Many thanks for the tip, and I hope, reply.
My favorite is GRK Brand screws like these: www.amazon.com/dp/B001SF790A?linkCode=ssc&tag=onamzdigitalj-20&creativeASIN=B001SF790A&asc_item-id=amzn1.ideas.29WVINIJF4EUJ&ref_=aip_sf_list_spv_ons_d_asin but any brand of similar quality will work fine. The wire is ususally 12 or 14 gauge but that depends on if it's solid or stranded so start there and adjust accordingly. You can sure use tapcons but I wanted to show that other, less expensive types and brands work well to for many applications so use what you're comfortable with for the price. Best, Matt
This is a really helpful tutorial thank you! Im wondering about the safety of using Silica Sand... isnt it toxic to breathe?
Gasoline fumes are toxic to breathe... do you wear a haz-mat suit at the filling station or do you just stay mindful of what you're doing to avoid inhaling them? That's the perspective I use...
Well I really don’t think the hinge orientation matters. But, I always put the 3 hole in the door, two on the jamb. For aesthetics, the same reason I always clock my screws on wall plates and, whenever possible on other installations.
OK, I check all my 26 doors. Doors that open toward me with the hinge on the right have 2 knuckles. Doors that open toward me with the hinge on the leftt have 3 knuckles. I.e., the hinges are all identical and have the same orientation; no modifications were done. Here's my new guess: With 3 knuckles on the door, you can always put your thumb under the bottom (3rd) knuckle to help hoist the door into position. There is no interference from door's hinges or jamb, and no pinch hazard when mounting the door. With 2 hinge knuckles on the door, you cannot use that "thumb lift" assist, the jamb hinge 3rd knuckle gets in the way. So simple, but effective. I have all 8' 4-hinge doors and the solid doors are quite heavy - so I also use a "foot-operated lifter" (a stiff putty knife on a small block of wood). That, coupled with a "thumb lift" on the 2nd hinge from the top, should make reinstallation much easier. I'll be reversing the hinges on my right-side doors when I next remove them. Thanks NLC!
Congratulations Cayeye... you nailed it! It's simply about the ability to lift/position the door using a thumb under that bottom knuckle making the process easier and faster with far less likelihood of getting pinched in the process. So many doors are pre-hung these days and no one in the mass production environment is EVER going to take the time to "hand" the hinges to match the swing of left and right handed doors, mainly because they never have to actually hang a door. They just slap them on and screw 'em in place with the pins pointing up, which ever way the manufacturer makes their particular hinge. This is a prime example of one of my favorite quotes "you gotta make it easy on yourself because no one is going to do it for you!" Hence the dedicated Hinge Pin Removal Block I made for the purpose of handing hinges. It shows up in the video here: ruclips.net/video/A3X7rPbgcJ4/видео.htmlsi=ujTckio09Maqoa2O&t=280 If it generates enough interest I may even do a short video showing how to make one and offer a PDF plan... Thanks for taking a deep dive into this... your effort and conclusion settle the matter and will benefit any viewers who take a minute to read this thread. Best, Matt
@@NextLevelCarpentry It's always a pleasure watching your videos, and thanks for sharing your knowledge, creativity, and experience with us.
@@cateye45 youbetcha... just payin' it forward from the guy who taught me this back in about 1990! 😎
liked before even watching
i'm not in the game, but i put the 3 on the jamb for 3 vague reasons. 1, if the door will be off for some time, i store the pin inplace in. the 3 and looks cleaner. 2 when rehanging them [invariably alone] i can stick my hand up under that bottom knuckle without worrying about it getting pinched while guiding the knuckles to interleave w my thumb. 3. while my hand in under the bottom knuckle to guide the door into place, i leave the pin inserted into the top knuckle, askew, so it stays up there quietly. when i get the door in, it's just enough to bump it and have the pin drop into place without letting go of the door. … it takes longer to explain than to do.
Good job ! What you share is so enlightening. Thanks
What about me ? I'm here to the end of the end of the end also. So three of us. 🤣
It's a PARTY!!!🎉🎊
To much talk
"To" much talk? More like not enough basic spelling and grammar... you should work on that.
Great job!
Thanks!
Very cool!
Indeed.
LOL "this machine has no brain, use your own"
Totally appropriate, don't you agree?
Nice explanation for a part of carpentry all of us face from time to time. One house I worked in had three hinges on each door with leafs turned in different patterns so the painter could not easily place the door in a different jamb.
You're too kind: the scenario is much more likely a scatterbrained carpenter than strategic planning IMHO.
I always put the 3 on the jamb so I can precariously start the pin so it stays up there. Then I grab the door and get the top hinge in and jiggle the pin so it falls in a bit, then the bottom hinge. Curious to know why the Master does it differently. Great vid as always. Next time I make a hinge jig I will definitely try this and leave the jigsaw in its drawer.
Gotta do what works for you, even if it's opposite. Stay tuned for my explanation... I'm still waiting for someone to hit the bullseye.
I really didn’t think it made any difference on the hinge knuckles. Weather the jamb, or the door has the 3 knuckles. Some hinges have pins held in place with a set screw. You can’t flip the hinge to put 3 knuckles on the door for both left and right swing doors. If you do, one swing will have the pins go in upside down.
I don't think there's a functional difference between the two orientations but there IS a difference I prefer. BTW Even hinges with "nerps" (NonRemovablePins) can be flipped but it requires driving out the little button on the bottom of the bottom 3rd knuckle and re-driving it into the top knuckle. It works because the nerp screw is in the center of the center knuckle so it's 'ambidexterous'. FWIW I've done this exact thing on hundreds of commercial grade ball bearing style heavy duty hinges.
@@NextLevelCarpentry Thanks for your answer. I always enjoy your videos. You do everything well, and I admire that. “How you do anything, is how you do everything!”
Always a joy learning from your channel!
Glad to hear it!
can't you use the second configuration (after moving the stop to the other edge of the template) for both the door and the jamb? This would then use the same reference face for both leaves, and also you would need to reconfig the template (or make two of them)
Good eye! You sure can orient the stop for both situations... and, in most cases, it's a better approach. Truth be told I got caught off guard in production for the video because I started out needing to only mortise the door edge so the first configuration was easier/better. When I decided to do a video of the process for RUclips I had to backpedal for the sake of the video. I decided to leave the swap-er-roo in the final production so viewers would see and understand the differences and benefits and be able to decide for themselves depending on the task at hand.
Don't want to stop the guessing, but I think I’ve always done it because it’s the extension of a simple hinge (1 knuckle each). With a simple hinge, the jamb side must occupy the lowest position - you “hang” the door/gate onto it. So… it just seems right and logical that the jamb side should always occupy the lowest position in the stack. Not sure it matters in any other way as you increase the number of knuckles. Note: I suppose it is possible to have a simple hinge constructed with an unremovable pin. When installed upside down, the door is still technically “hanging” on the jamb via the pin - but that’s just weird. Although.. I think I have seen cabinet hinges constructed like this, albeit with a 2-1 knuckle configuration.
Bottom line, IMHO, is that it's more of a practical answer and less than a technical one.
Copacetic! I would wager that the door is heavy/unwieldy to align compared to the static hinges in the wall. By putting the three pins on the door you can more easily align the bolt on both the top and bottom and shim the door as needed until you can seat both hinge bolts down. I.E. You start with the bolt in the door's hinge and align it to the wall instead of trying to hold the bolt in the wall's hinge and getting the door aligned there.
3 vs 2 leaves - depends on whether it's left or right door. Nobody bothers to remove and reinstall pins even when it's possible :-)
Obviously we've never met because I'm just that "nobody" who actually DOES remove and reinstall pins so that the 3 knuckle leaf is always on the door. I'd agree that (almost) nobody ever cares or knows which leaf is where but, yes, I'm "that guy". 😉
There is a company, Templaco, that sells full-door hinge jigs, and, I think, if one needs to mortise several doors/jambs, a $100 might be well spent to save all the trouble.
Why not but an adjustable hinge router templet from Templaco for $33
You're free to do what you suggest... but you might want to keep this method in mind for when you forgot your Templaco template back at the shop or you need to do just 2 hinges of a different size and don't want to wait to special order another template for your collection?
Don't take this the wrong way. It's cool tou have this video and you make money from it, free enterprise. But i read comments and people have watched this video 20 to 30 times which amounts to an average of 13 hours, not counting the work and i have done chiseling and if you are average it takes a while. Add in the work, picking up good straight lumber thats doesn't need to go through a joiner or planer and other things that happen to the best of them and you may be talking 20 to 50 hours of "work." That time could be best used to help (volunteer) to help people in need, maybe cook for them or clean for them etc. Or, if money work an 8 hour overtine for the month and buy a pair. I get it an accomplishment, but most are busy and if you aren't retired (even if you are) after a while (and i built things) you have so much crap that you donate it or give it away, one can make so much for tbe house, especially if you do it for 10 or 20 years. Remember, instade of 30 hours for one project rhat should take a couple hours volunteer that time to help others. God Bless you all!!
20~50 hours of work to build these sawhorses?! Good grief, no wonder your suggestion is so socialist in nature. You're probably a nice fellow but your comment and reasoning is whack... juss sayin'!
@@NextLevelCarpentry you are a nice man, but my first sentence states, basically, great, you earn money from the video, GREAT, free enterprise (that sort of means what you do you get to keep and reap the rewards without red tape and government interference). Also, said, about the comments, some watched a 30+ video 20 to 30 times, do the math = that's 600 to 900 minutes not counting going to the store to buy the wood, maybe buy a moisture meter too and other things and most, especially beginning (I didn't) don't have a joiner or planer and if they go to a box store that's waste, but I digress. I was just talking about the hours invested in watching a saw horse video. They should make it in couple hours (not over a thousand minutes) and instead use that time to earn money(i.e. the 8 hours o.t. a month) or help some vets and/or volunteer at the church instead and help those that really, really need help, build the saw horses for the church instead. I think your video is good but made way to complex for the beginner and if you are about beginner you should be able to make your own saw horses, that's all brother!! P.S. you do make a great presentation, but read some of the guys that watched your video 20 or 30 times and I think you will agree with me. God Bless Brother!!
I imagine that you too are 'a nice guy' but your perspective seems to be rooted in socialism, academia or government bureaucracy. For one, it's ridiculous to conclude that if someone 'watches' the video 20-30 times that they watch the entire thing, beginning to end, each and every time. That, frankly, is stupid. If you look up a word in the dictionary that starts with the letter "L", do you start with aardvark and end with zenith? Do you suggest that people shouldn't invest time learning because their first attempts take exponentially more time than later attempts after they gain knowledge and experience? Think of the video as a college course: 'way to complex for the beginner' but, after taking the course, it's routine to the point that the beginner will 'be able to make their own sawhorses' in jig time. It's called learning. To imply that the time is wasted if not spent virtue signaling is arrogant on your part. Please don't project your shortcomings and motivations onto others who invest time to learn skills that make them productive members of society with the implication that they're not as altruistic as you portray yourself. Regards, Matt
@@NextLevelCarpentry Hi, I try to be nice. It is so funny that you think I am a socialist (that's the money arm of communism so just call me a communist or cultural marxist (lol)). I am so far from that. If I was a communist then I am doing so much wrong when all my children are ultra conservative and religious and the one husband is the same as is my wife. Your assumptions, because I think instead of watching your video 30 times (and if they are watching for a minute each time cool, but you then are assuming how long they are watching your video and I am, once again going by facts). If they only watched a bit each time then say i checked back for such and such 30 different times. If someone said they saw the Godfather 30 times, by your ridiculous assumptions that person could have only seen 30 minutes (assuming "watching" means what your meaning of watching is) of the Godfather. Again you are assuming they only watch for a bit and for a saw horse, really, come on you know you can take 5 eight feet 2x4's and make a pair of those. If they want to really learn don't use power tool, so they can get the feel of tool work in the beginning. Buy I stand by helping others, which means you must be a government man and say watch my video for 10 hours and those in need go to the government that's what they are there for. That is the attitude, not helping one another through private, town and church help, but run to the government and raise my taxes which I know are 5 times your taxes so I guess I got to subsidize you guys all the time and your mouthing that you help people stems from greed or Pat's on the back, if I'm wrong donate all the money to young people learn carpentry instead of having me an other taxe payers subsidize all you guys that are greedy. God bless brother and I will say extra prayers to the Lord our Saviour for all those wasting hours (and I know kids that male these in work shops and you do too and if it is to complicated maybe carpentry isn't for you) watching videos. P.S. they should learn (assuming they are adults) by trial and error and doing like most of us did. P.S.S. I still can't wait to tell the family you think I am a socialist (I mean communist). Wait, that's the term communists use, meaning socialist or progressive or democratic or democrat instead of communist. Are you sure you aren't one of those what's mine is mine and you guys pay for everything (a.k.a. A communist) while I really don't work for a living. God Bless!!
@@james8583 Wow... just, wow! SMH
A 28 minute video from you? Are you feeling unwell?
I nearly had a nervous breakdown when, at the end, I said "I could have easily doubled the length of this video..." but didn't! 🤣
Answer: Because you want to. Your OCD causes you to like the look of it. There is no specific reason to orient a hinge with the 3 knuckle leaf on the door, as long as the pin goes in from the top. That being said, I do the same for my own safety. When lifting the door into place by the hinge, if the 2 knuckle leaf is on the door, you can pinch your finger, which hurts tremendously and slows you down the rest of the day. That's the only real reason for putting the 3 leaf plate on the door.
Close...
Is it because when hanging a door it is easier to place the top knuckle on the top knuckle of the frame at a slight angle and angle the hinge together with out having to support the weight of the door while doing so? Would this also prevent you from pinching your skin in the process of assembling the hinge?
Thanks for weighing in... getting close to the simple and practical reason I have.
Me and the other guy appreciate the tip!
My work is done here now! 🤣
👍👍👍👍👍🫵
👍
👍👍👍
In case you need to adjust the door gap?
Good to see you here, Jonathan! Doesn't really have anything to do with door adjustment though... in my world, at least.
The 3 knuckle leaf weighs a bit more, so you get a better workout when hanging in the door. To be honest, i have no clue and whould instinctively put the three knuckle leaf on the frame.
Stay tuned... the answer I have is rather banal but very useful and practical IMHO.
Is it for added support for the door?
There's no 'added support' for the door, regardless of leaf orientation.
Do you know how long we all took to chisel our hinges in our Carpentry class? Lol. Love your work. Need an assistant?
I sure could use an assistant to chisel hinge mortises if I didn't have a router and template, that's for sure!
Absolutely fantastic, as always. Another great video.
Very good very well done very well explained. I am now a retired Carpenter and I did exactly almost exactly the same thing that you did with that jig. I think I put the guide you did on the front at the beginning so it registered off of the face of the door and the and the edge of the jam from the beginning rather than switching like you did but the exact same process I've never seen anybody else on RUclips do what you just did and it was such a pleasure to see the same thing that I had done over the years making different templates to accommodate the different radii of the different hinges that being used. I really appreciate your videos and another guy that's on the same level Spencer Lewis, who is a little bit younger but he's an up-and-coming high-dollar builder. Thank you so much for your video!
You're spot on with the 'universal jig' approach to hinge mortising... many will find it helpful if they read your comment and understand the difference. FWIW I too believe Spencer at Insider Carpentry has a bright future in any direction he cares to go... and you can tell him I said so. 😁
I am planning to make the universal jig that you describe. I also plan to bridge the top surface over the guide. This will help keep the router from tipping if I get in a hurry. I also plan to make it a triple fixture since I do almost all 6/8 doors. I think that if I make the ends identical with a 5" leg then it will be reversible. I can just use a 1/8" spacer against the head jamb to offset the jamb spacing.
@@scottgates4616 You remind me of me 'back in the day'! You already brainstormed through the design and will end up with a very slick hinge routing jig... nice! At some point an 'official' hinge routing template/fixture like the one expandable one Trend makes might make sense? I see it can be adapted for various door heights and hinge count which might make it a good investment, depending on how often and how similar your door hanging projects are. Personally it's so rare that I do any two doors that are alike that I don't have a 'fancy' setup but can imagine a workflow where it would make sense. Best, Matt
Another great look at your processes!
Thanks for taking time out of your frenetic schedule to watch and comment my friend... much appreciated!!
I’m glad you posed this question. Gets us thinking and I like the dialogue.
Posing the question was an ad-lib moment during video production and is generating more buzz than expected... hope the ultimate answer I have to offer isn't too anticlimactic for everyone who's weighed in?
Why would they replace rectangular hinges with rounded ones? If that's what this historical house had...
LLLLLLLLLLLLLLLLLong story... it would take a novel to explain it all but it's not what you're thinking.
@@NextLevelCarpentry You are underestimating the power of my imagination :-) Does the house belong to someone who bought a large quantity of these hinges and went broke unable to sell them? 🙂
@@weekendwarrior3420 😎A key factor is that there's such a hodgepodge of doors in the house from original ones 100 ish years old to newer, prehung ones and other new replacement slabs hung in 50 or 100 year old jambs that this is primarily an attempt to create a new common denominator and, on the contrary, breaking the remodeling budget bank isn't even a factor for this particular client.
@@NextLevelCarpentry Ok, it's between you and the client of course. I, personally, would just use the same type of hinge that was there before and not deal with patching the holes. Because, practically, a person can only see one door at once, and rarely focuses on hinges. As long as they have the same finish I'm almost sure nobody will notice.
In many (most?) remodeling projects there's no perfect answer/approach to the problem so I generally find it a compromise between client and carpenter. This job, this time this is the 'best' solution but it's far from the only acceptable one.
By having the 3 knuckle on the frame the door knuckles both sit on a supported surface. Additionally the moment arm from the door which causes shear forces on the pin will be supported in by 3 knuckles instead of 2. That’s my best guess!
First: I always put the 3 knuckle leaf on the door, not the jamb/frame. I don't think there's any real strength benefit regarding 'shear forces' involved... think of a 'weakest link in a chain' scenario where it doesn't matter which end of the chain is being pulled harder?